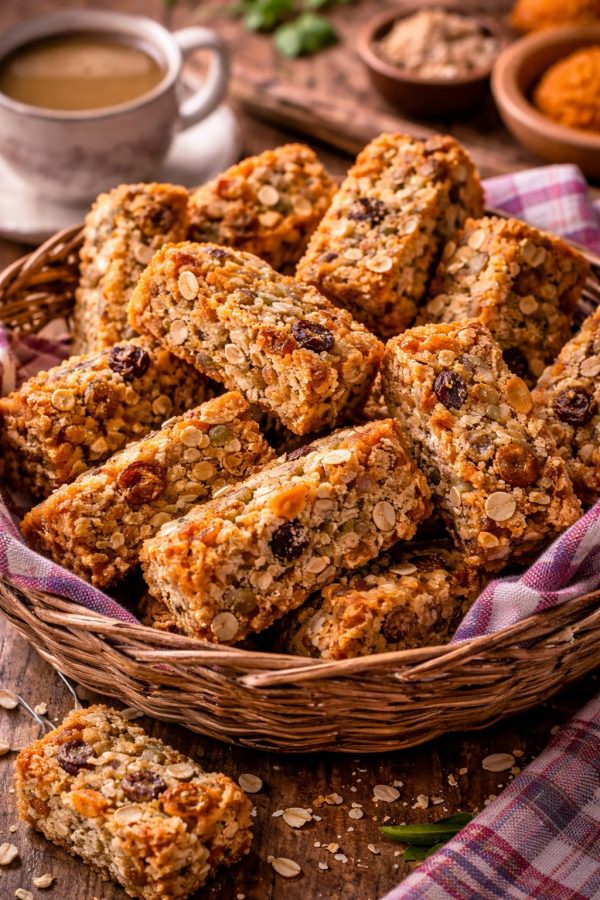
South African Muesli rusks

These South African muesli rusks are hearty and perfect for dunking in coffee or tea. Here's a recipe for making your own muesli rusks:
Meusli rusks with raisins

South African muesli rusks are a delicious variation of the classic rusks, incorporating oats, dried fruits, nuts, and seeds for added texture and flavor. These rusks are hearty and perfect for dunking in coffee or tea. Here’s a recipe for making your own muesli rusks:

muesli

Ingredients:

  • 3 cups all-purpose flour
  • 1 cup rolled oats
  • 1/2 cup muesli mix (you can buy pre-made muesli or make your own by mixing oats, dried fruits, nuts, and seeds)
  • 2 teaspoons baking powder
  • 1 teaspoon baking soda
  • 1/2 teaspoon salt
  • 1 cup sugar
  • 1 cup butter, softened
  • 1 cup buttermilk (or substitute with regular milk plus 1 tablespoon vinegar or lemon juice)
  • 2 large eggs
  • 1 teaspoon vanilla extract (optional)
  • 1/2 cup raisins or dried fruit (optional, or use any other dried fruit of your choice)
  • 1/2 cup nuts (e.g., almonds, walnuts) or seeds (optional, for extra crunch)

Instructions:

Step 1: Preheat the Oven

Preheat your oven to 350°F (175°C). Grease a large baking pan (about 9×13 inches) or line it with parchment paper for easy removal.

Step 2: Mix Dry Ingredients

In a large mixing bowl, combine the flour, oats, muesli mix, baking powder, baking soda, salt, and sugar. Stir well to evenly distribute all the dry ingredients.

Step 3: Add Butter

Add the softened butter in small cubes to the dry ingredients. Using your fingers or a pastry cutter, rub the butter into the dry ingredients until the mixture resembles coarse crumbs.

Step 4: Mix Wet Ingredients

In a separate bowl, whisk together the buttermilk, eggs, and vanilla extract (if using).

Step 5: Combine Wet and Dry Ingredients

Pour the wet ingredients into the dry mixture and stir until just combined. Be careful not to overmix the dough. If you’re adding dried fruit and nuts, fold them in at this point.

Step 6: Shape the Dough

Turn the dough out onto a floured surface and gently knead it a few times until it comes together into a firm dough. Flatten the dough into a rectangle about 1 inch (2.5 cm) thick. Transfer the dough to the prepared baking pan and press it down evenly.

Step 7: Bake the First Round

Place the pan in the preheated oven and bake for about 40-45 minutes, or until golden brown and cooked through. You can check if it’s done by inserting a skewer into the center—it should come out clean.

Step 8: Cut and Bake Again

Remove the pan from the oven and let the dough cool for 10 minutes. Then, turn it out onto a cutting board and cut it into finger-sized strips or squares.

Place the pieces on a baking sheet, ensuring there’s space between each piece to allow for proper drying.

Step 9: Dry the Rusks

Lower the oven temperature to 250°F (120°C) and return the rusks to the oven. Bake for an additional 2-3 hours, flipping the rusks halfway through, until they are completely dry and crispy. The rusks should be golden brown and crunchier than when you first cut them.

Step 10: Cool and Store

Once the rusks are fully dried and crispy, remove them from the oven and allow them to cool completely. Store the rusks in an airtight container to keep them fresh and crispy for up to two weeks.

Enjoy!

These muesli rusks are packed with flavor, texture, and wholesome ingredients, making them a perfect snack to enjoy with your morning coffee or tea. They’re great for dunking and perfect for a healthy, satisfying treat!

Storing rusks

Storing rusks properly is key to keeping them fresh, crisp, and delicious. Since rusks are baked twice to make them dry and crunchy, they tend to have a long shelf life. Here’s how to store them correctly:

1. Allow Rusks to Cool Completely

  • Before storing, ensure that the rusks have cooled down completely. If they are still warm, moisture can form inside the container, leading to sogginess or mold growth.

2. Store in an Airtight Container

  • Place the rusks in an airtight container (plastic or glass) or a tightly sealed tin. This will keep moisture out and maintain their crispiness.
  • You can also use resealable plastic bags for smaller batches, but make sure to remove as much air as possible before sealing them.

3. Keep in a Cool, Dry Place

  • Store the rusks in a cool, dry place, away from sunlight, heat, and humidity. A pantry or kitchen cupboard works well.
  • Avoid storing them in areas that are too warm or moist, as this can make the rusks soft.

Take a look at more delicious recipes on our recipe page

462558911 451332720905224 5946744884052565162 n

Add your recipe

If you have a recipe that you would to share by having it published on the SA2UK website, then please contact us at info@sa2uk.co.uk